

Step-by-Step: How We Build a Custom Pool
Straightforward. Transparent. No hidden steps.
Building a pool shouldn’t feel confusing or overwhelming. You deserve to know exactly what’s happening in your backyard and when it’s happening. Here’s a clear, start-to-finish look at how we build every Austin Dreamscapes pool—from first sketch to first jump.
Step 1: On-Site Visit & Design
We start by coming out to your home and taking a real look at your yard—access, sunlight, layout, and how the pool will fit into your space.
Then we talk through what you’re dreaming up: size, shape, depth, features, and the overall style you want.
Once we understand your vision, we build a clear 3D design so you can see exactly how the pool will look in your yard before anything starts. When you’re happy with the design, we move forward to the next step.
Step 2: HOA & Permits
Before we break ground, we make sure everything is cleared and approved. If you’re in an HOA, we put together the full submittal package for you—pool layout, materials, and all the details they normally ask for. You won’t have to deal with the back-and-forth; we handle that part.
If your home is inside city limits, we also file the required permits so the project is fully authorized before construction starts.
Whether it’s the HOA, the City of Austin, or both, we take care of the paperwork so the process is smooth and you don’t get stuck navigating any of it on your own.
Step 3: Layout
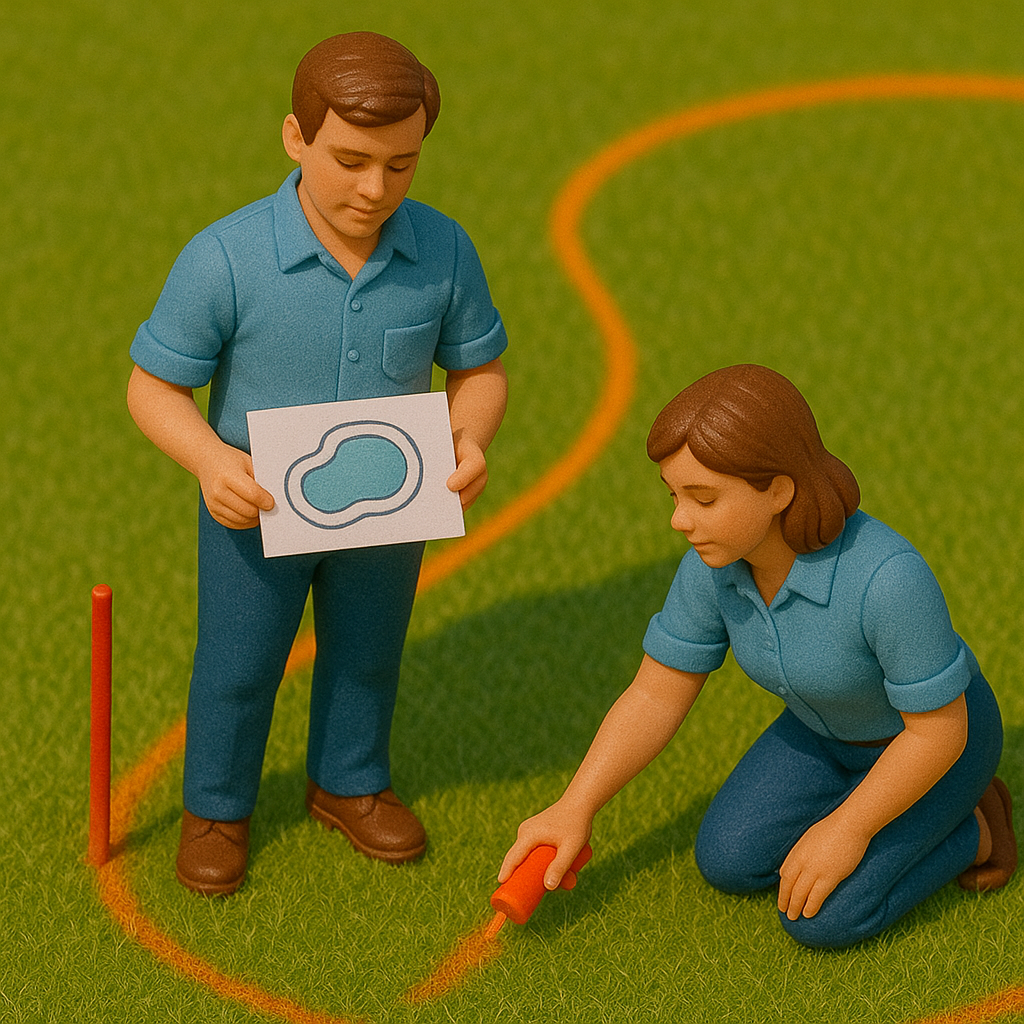
Once everything is approved, we come out and mark the exact shape and location of your pool on the ground. This includes painting the outline, setting the elevations, and checking all the measurements so the pool sits perfectly in your yard.
This step is important because it lets you visually see the pool’s footprint before we start digging. If you want to shift it slightly, widen an area, or make adjustments for shade or furniture layout, this is the moment to do it.
By the time layout is complete, everyone is on the same page and the project is fully ready for excavation.
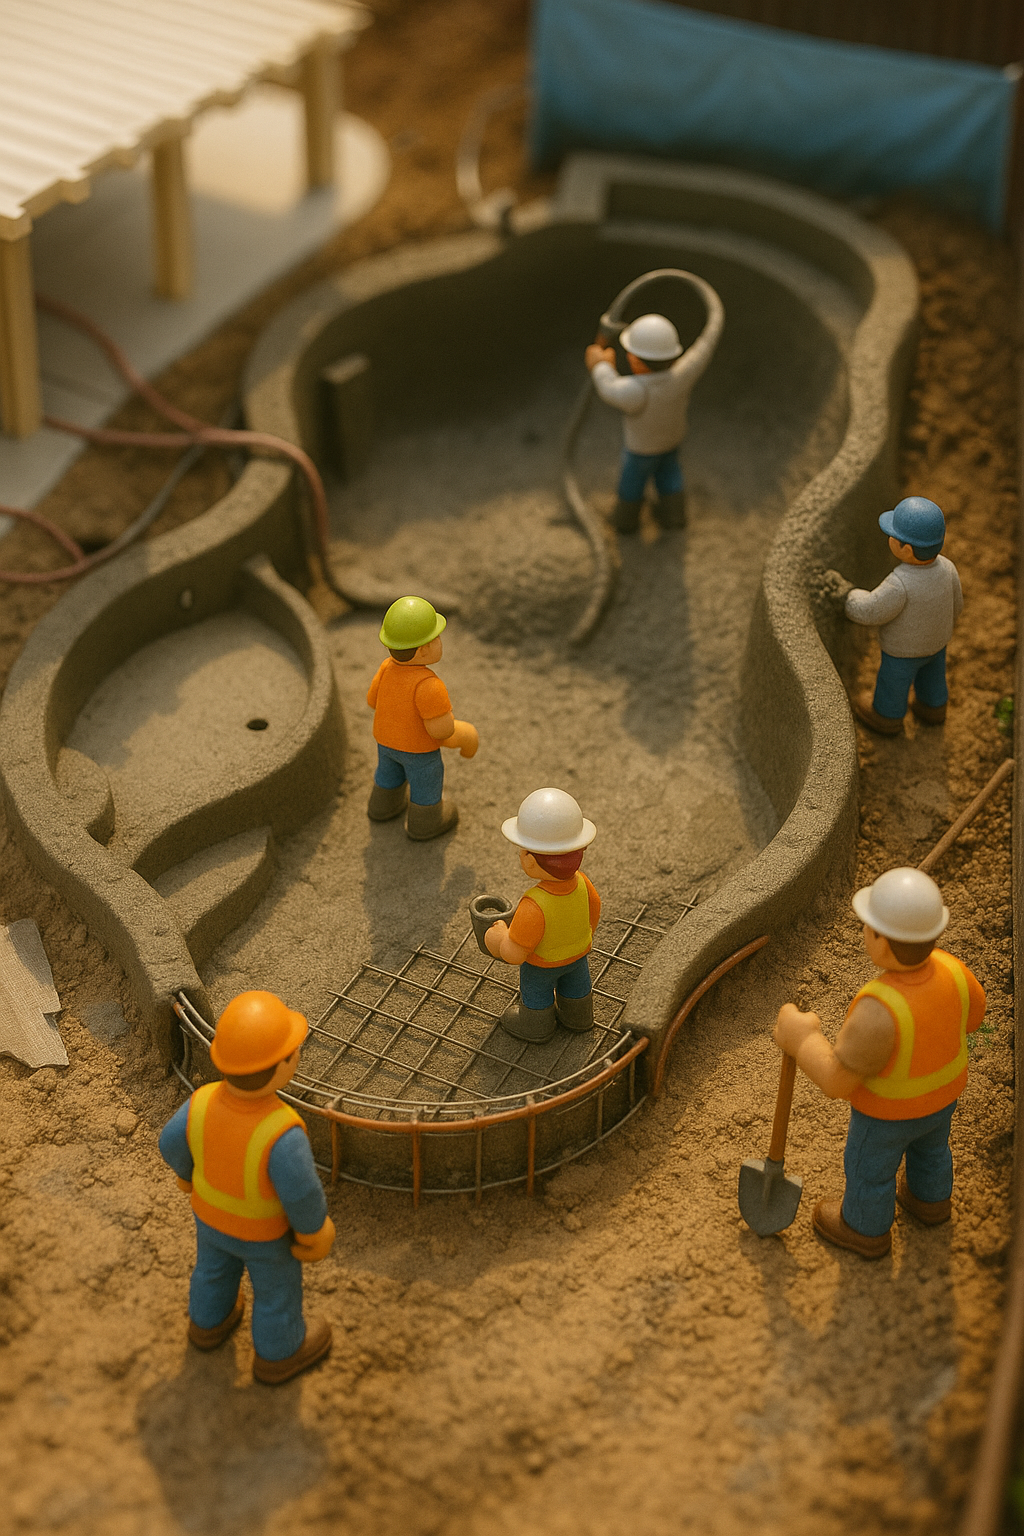
Step 4: Excavation
Excavation is when the project really comes to life. We bring in the equipment and start digging the pool to the exact depth, shape, and layout you approved. Every step, bench, and contour is carved out so the structure matches the design perfectly.
During this phase, we also haul away the dirt or set aside what’s needed for later grading. The crew shapes the walls, smooths the floor, and cleans out loose soil so the pool shell is clean and ready for the next stage.
By the end of excavation, you’ll clearly see the size and feel of your future pool—it’s the first big transformation in your backyard.
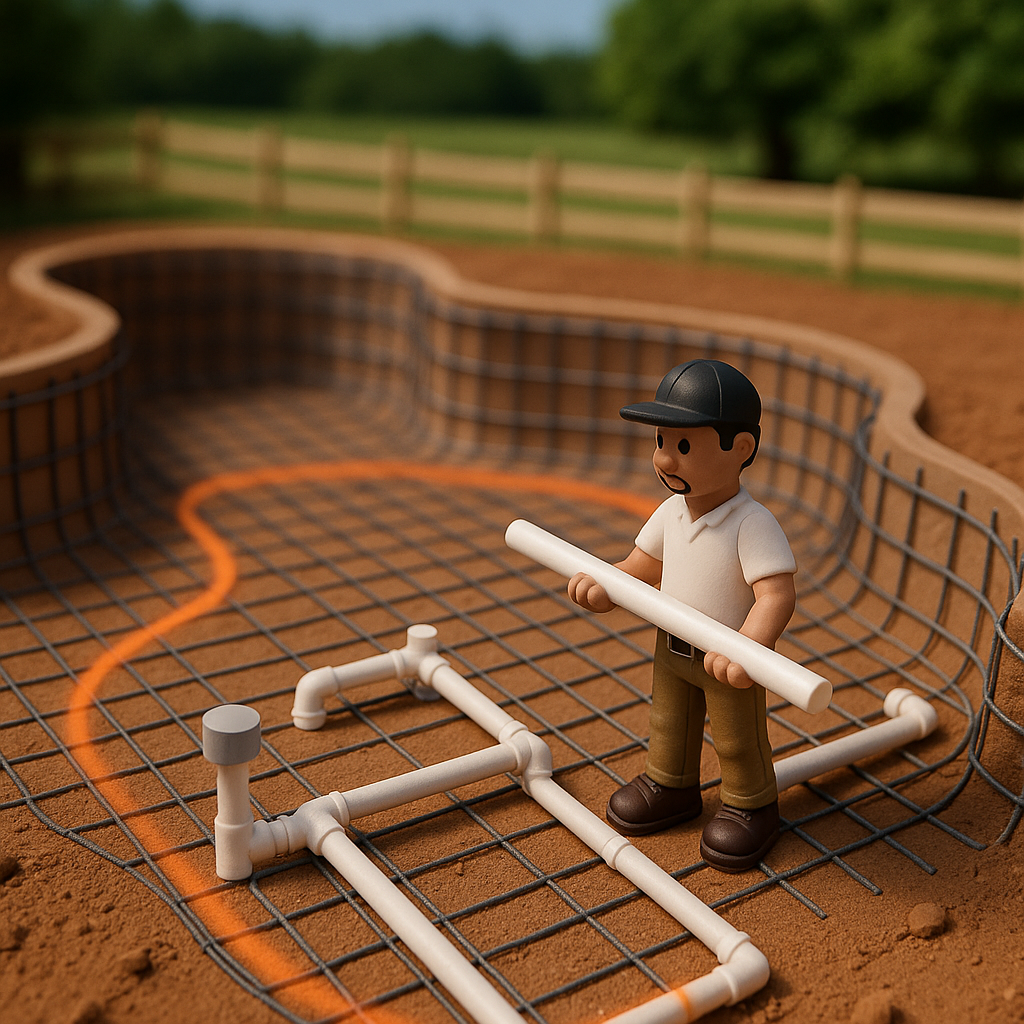
Step 5: Steel Rebar
After the dig is complete, we start building the structural backbone of your pool. This is where strength really matters. We install a full grid of steel rebar across the floor, up every wall, and around all the steps, benches, and ledges.
The steel is tied together tightly so it forms one solid cage. This reinforcement is what keeps your pool stable through heat, rain, shifting soil, and the natural movement of Texas ground. Good rebar work isn’t something you notice after the pool is done, but it’s the difference between a pool that lasts a few years and one that lasts for generations.
We take our time here—clean lines, tight spacing, and no shortcuts. When the steel is finished, you’ll be able to recognize the shape of your pool, and it’s officially ready for plumbing and electrical to begin.
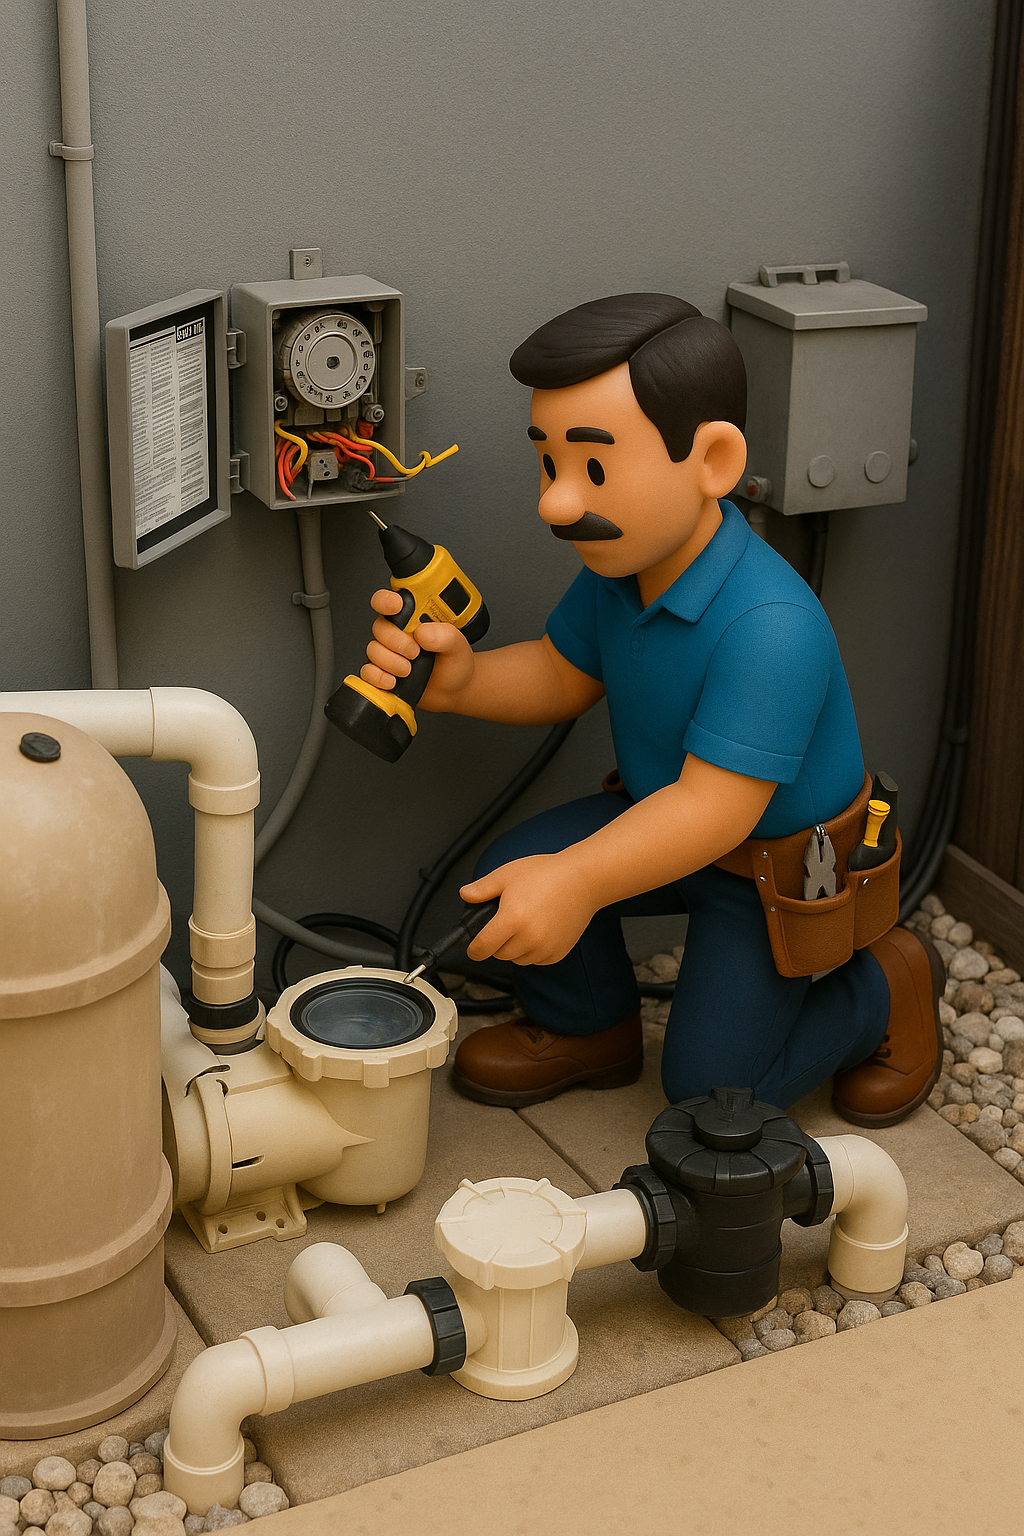
Step 6: Plumbing
With the steel in place, we move on to the plumbing system—the lifeline of your pool. This is where we install all the underground pipes that keep your water moving clean and clear.
We run lines for:
Skimmers
Main drains
Return jets
Spa jets (if you have a spa)
Waterfalls or fountains
Cleaner lines
Any additional features you added
Every pipe is installed with proper spacing, depth, and flow direction. Once everything is connected, we pressure-test the plumbing to make sure there are zero leaks. This is one of the most important steps for long-term reliability.
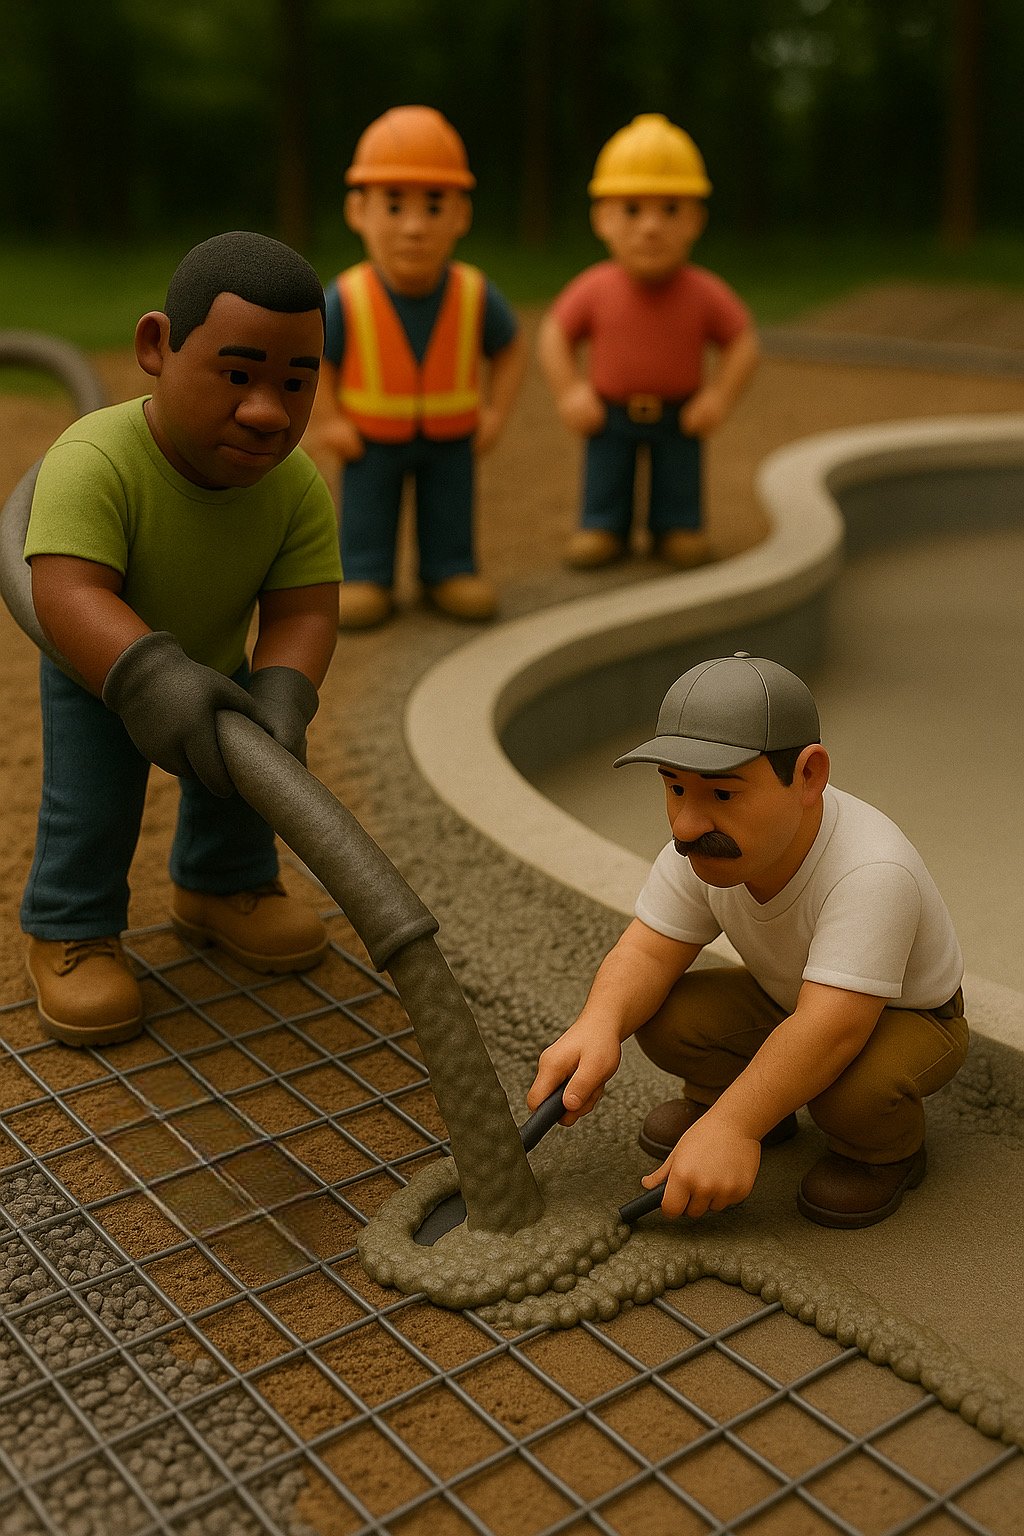
Step 7: Gunite
Gunite is when your pool finally becomes solid. A crew sprays a concrete mix over the steel frame, and then shapes the steps, benches, and walls so everything matches the design you approved. By the end of the day, your pool looks real.
Gunite creates the main structure of your pool. It’s strong, durable, and built to last.
For the next 7 days, you’ll need to water the gunite shell once or twice a day. This helps it cure properly and prevents cracking. It only takes a few minutes, and we’ll show you exactly how to do it.
Once the shell is curing, we clean the site and get everything ready for tile and coping.
Step 8: Tile & Coping
Once the gunite shell has cured, we move into one of the most noticeable parts of the build: tile and coping. This is where your pool starts to show its actual personality and style.
Tile
We install your waterline tile around the top edge of the pool. This protects the pool from staining at the waterline and gives the whole design that clean, finished look.
Whether you chose glass, ceramic, or natural stone, this step is where those design decisions finally show up.
If you added accent tiles, mosaics, or raised walls, we install those at the same time.
Coping
Coping is the stone or concrete border that sits on top of the pool’s edge. It frames your pool and creates the transition from the water to the deck.
Common options include:
Lueders stone
Travertine
Concrete coping
Paver coping
Bullnose or square edges
We set each piece carefully to keep the lines straight, the joints tight, and the edges smooth.
This is the first step where you’ll really see the style take shape.
Tile and coping set the tone for the entire look of your pool.
Weather can slow this phase down, since everything needs to be dry for proper installation.
Once tile and coping are complete, your pool starts looking more “finished,” and we’re ready to prepare for decking.
Step 9: Decking
Once the tile and coping are in place, we move on to the deck—the space where you’ll relax, grill, and spend most of your time around the pool. We start by setting forms to outline the exact shape and making sure everything slopes correctly for drainage. This keeps rainwater moving away from your pool and house.
Your decking material can be concrete, stamped concrete, travertine pavers, stone pavers, or modern concrete pads. Whatever you chose, our goal is the same: install it clean, level, and built to last. Concrete decks are poured and finished, while pavers and stone are set piece by piece for a tight, consistent look.
Decking is a big visual milestone. Once it’s done, your backyard really starts to look complete, and we’re ready to move into the equipment phase.
Step 10: Equipment Installation
Once the deck is finished, we move into setting up the “engine” of your pool—the equipment pad. This is where all the behind-the-scenes magic happens to keep your water clean, clear, and circulating the way it should.
We start by placing all the equipment in a clean, organized layout. This usually includes:
Pump
Filter
Heater or chiller (if you chose one)
Spa blower (for spa owners)
Automation system
Valves and manifolds
Pool lights and electrical connections
Every pipe is tied into the pad with clean, direct plumbing so everything runs smoothly and can be serviced easily down the road. We make sure the pad is neat, labeled, and accessible—not a messy pile of pipes like you see with some builders.
Once everything is installed, our electrician connects the power and automation. This is when your pool officially starts to come alive. We test the system, check flow, and make sure every component is working exactly the way it should.
Step 11: Electrical Finish-Out
After the equipment is set in place, our licensed electrician comes back out to finish all the power connections. This is the step where everything gets tied into your home’s electrical system.
We run the wiring from your equipment pad directly to your main breaker panel and make sure it’s safely connected and labeled. This gives your pump, heater, automation, and other systems the power they need to operate.
Next, we install and connect all the pool and spa lights. This includes running conduit to each light niche, pulling wire through, and sealing everything properly so the lights stay watertight and code-compliant. Whether you’ve chosen standard white lights or color-changing LEDs, this is when they’re fully hooked up.
Once the power, lights, and automation wiring are complete, we test every circuit and make sure everything is functioning exactly as it should. With electrical finished, your pool is officially ready for plaster and the final stages of construction.
Step 12: Plaster
Plaster is the final interior finish of your pool—the surface you’ll see and feel when you swim. Once all the electrical work is complete, our plaster crew comes in to apply the finish you chose, whether it's standard plaster, quartz, or pebble.
The crew preps the shell, applies the material evenly, and smooths or textures it depending on the finish type. This step moves quickly, but it’s one of the most important because it affects both the look and feel of your pool.
As soon as the plaster is finished, we start filling the pool immediately. This is crucial. Stopping the water halfway can leave a visible ring, so the fill must be continuous until the water reaches the middle of the tile line.
The fill usually takes anywhere from 12–48 hours depending on your water pressure.
Once the pool is full, we move into the start-up phase where the water gets balanced and the surface is brushed daily.
Step 13: Landscaping
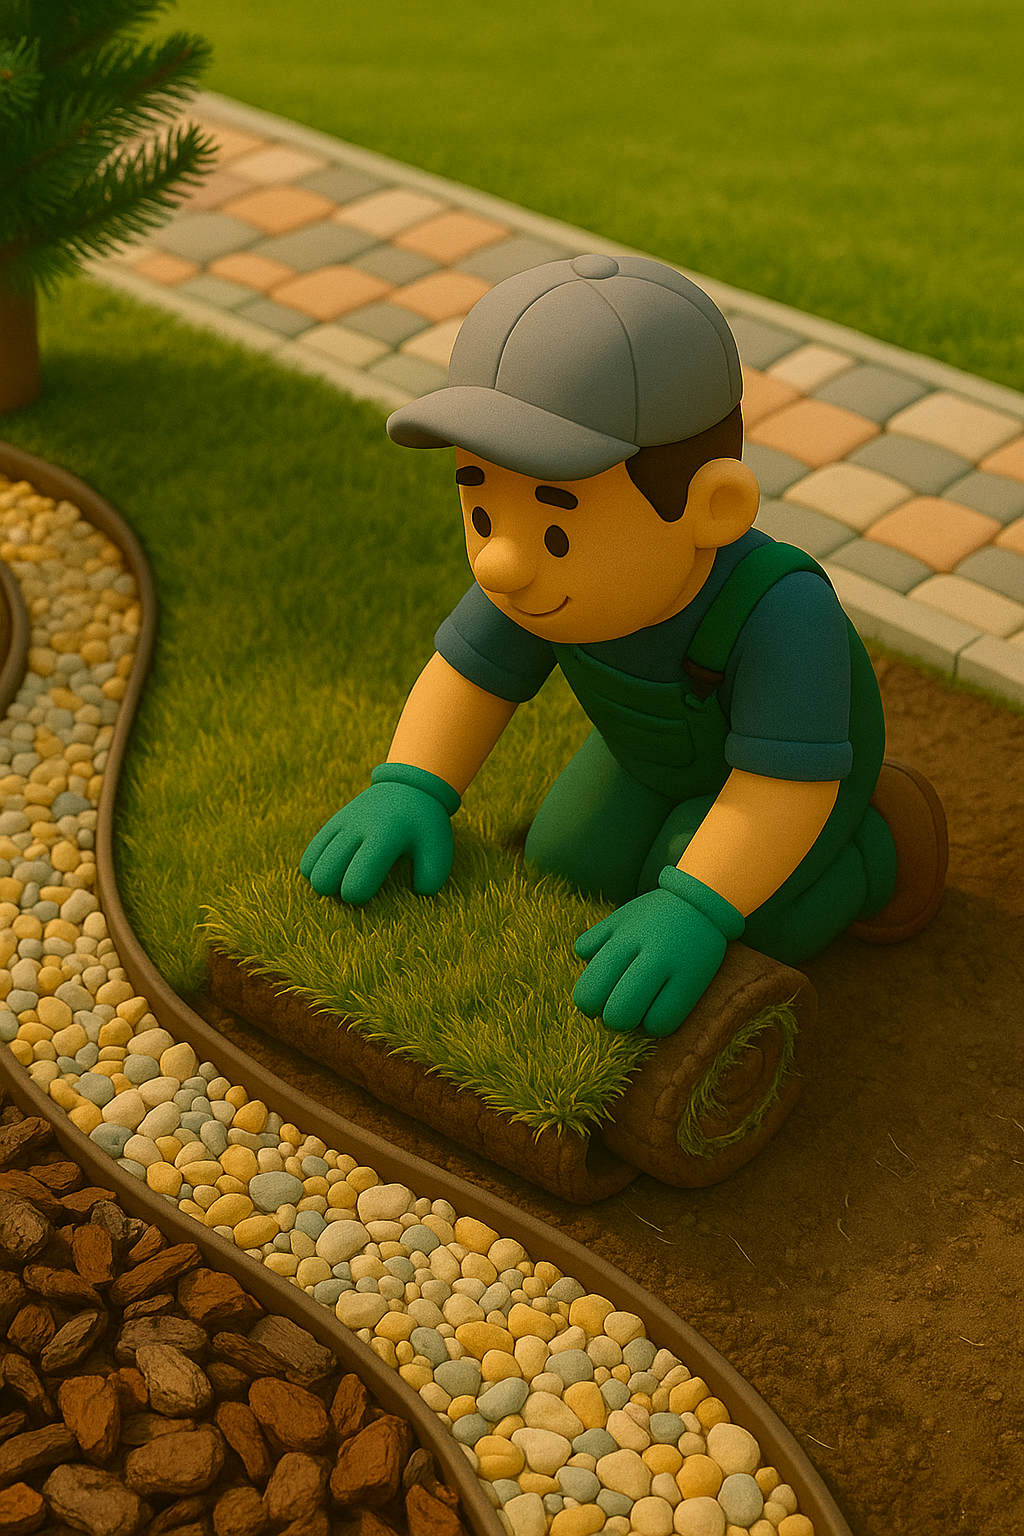
Right after the plaster is finished and the pool begins filling, we move on to the landscaping stage. This is where your backyard starts to look complete and everything ties together visually.
We grade the yard, install any sod, rock, mulch, or plants you selected, and clean up any remaining construction areas. If you’re adding sprinklers or adjusting existing irrigation, we handle that as well to make sure the new grass and plants are set up correctly.
Landscaping is a quick but important phase—it softens the edges around the new pool, blends the deck into the yard, and gives your outdoor space that finished, polished look.
Once landscaping is complete, we continue with the start-up process.
Step 14: Start-Up
Once the pool is full, we begin the official start-up process. This is where we balance the water, protect the new plaster, and get all your equipment running the right way from day one.
We use a startup barrel during this phase. This barrel slowly feeds the right mix of chemicals into the pool water as it circulates. It helps the plaster cure evenly and prevents issues like staining, scaling, or rough spots. Using a startup barrel gives the pool a smoother, cleaner, and longer-lasting finish.

During the first week, we brush the surface daily, adjust chemicals, and make sure your pump, heaters, lights, and automation are running exactly how they should. This step sets the foundation for clear, healthy water and a strong plaster surface.
The startup barrel protects your plaster during those crucial first days.
The water will be brushed and checked regularly.
It’s normal for the water to look cloudy at first—this clears up as the plaster dust is removed.
We handle the full start-up until the pool is stable and ready for regular use.
After the start-up is complete and everything is dialed in, we walk you through the entire system so you feel confident using your new pool.
Step 15: Pool School
Once the start-up is complete and your water is balanced, we walk you through Pool School—this is our hands-on orientation where we show you exactly how to run and take care of your new pool.
We go over everything in real time:
How to use your pump, heater, and automation
How to adjust lights, schedules, and features
How to clean the pool and empty baskets
How to check and balance basic water chemistry
What to expect during the first few weeks of a brand-new pool
It’s simple, clear, and made for homeowners with no experience. You’ll learn what to do weekly, what to watch for, and how to keep everything running smoothly.
By the end of Pool School, you’ll feel confident using your equipment, understanding your pool’s settings, and knowing exactly how to care for it day to day.
After this step, your pool is officially ready to enjoy.